Monday, May 16, 2011

Unique Germ Grenade

With all the germs floating around nowadays, we all need to keep one of these on hand. The Germ Grenade has been floating around the internet everywhere but usually only for sale.
The hand sanitizer I chose to use was made by Purell and can be picked up in the checkout line at your local Wal-Mart for less than $2.00 so go grab one and tie one of these for yourself to keep in your vehicle or on your person.
I found a tutorial for tying the Solomon Bar design at ITS Tactical.


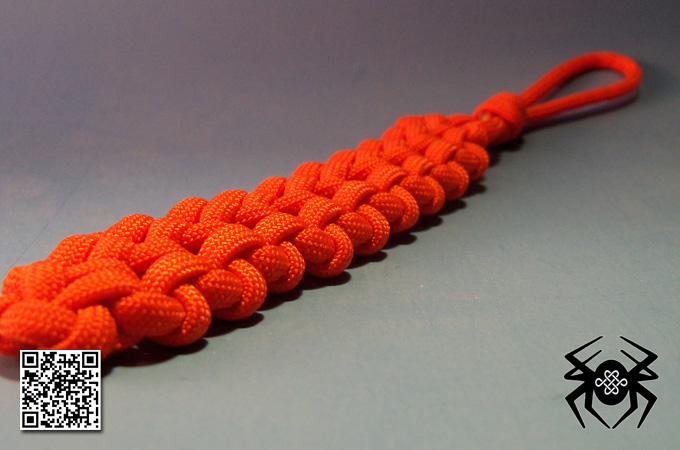
Thanks to a collaboration with Stormdrane I created what I think is a better looking grenade. I tied it using West Country Whipping, I used this tutorial to tie the grenade but a tutorial really isn't necessary other than getting started because this is one of the easiest designs to tie. Most of the time spent tying this grenade will be spent adjusting the cordage once it has been tied, I used my trusty knitting needle (a tutorial for creating this needle will be available later) which although it has a sharp point, it won't damage the paracord. Just keep adjusting until you reach the desired design.
If there is enough interest in this design I will include a tutorial for creating this type of grenade.

For more grenade images and grenade tying techniques, click the Continue Reading button...


NOTE: If tying a grenade using the West Country Whipping technique, you will need to keep in mind that the bottle shape will have an effect on the final outcome of the look of the grenade. The Purell bottle I used had hard edges which looked better to me than the GermX bottle because it was rounded.


This was the first West Country Whipping
I attempted, I used a GermX bottle for this one.

Friday, May 6, 2011

Unique Paracord Survival Gear-Episode I: Ripcord Sinnet


The first in the Survival Gear Series is one of my favorite survival bracelets, the Ripcord Sinnet. JD @ TyingItAllTogether has a video showing the tying technique and the unraveling process so I won't get into that other than to say that this bracelet can be unraveled in less than thirty seconds leaving a single 8 foot strand of paracord ready for survival use.

Click the Continue Reading button for more variations on tying this knot.


I varied the original tying technique by tying a 3/4" side release buckle to the red bracelet. The other bracelet was tied using the original tying technique  except I added a B.D.U. button to an olive drab bracelet that used somewhere around 9-10 feet of paracord.


 Ripcord Keychain Fob


Wednesday, April 20, 2011

The Paracord Survival Gear Series


In the coming posts I will be building on the theme of my last post by creating a series of survival gear made using lightweight nylon kernmantle 550 paracord.

To add a knot to the Survival Gear Series, once the knot is tied the user must be able to unravel the complete knot quickly without using any tools other than what the average person may carry.

So stay tuned and if you have any survival knots that you would like to see in this series, as always please let me know.

Saturday, April 16, 2011

Unique Survival Fob

This keychain can be unraveled and ready for use in less than thirty seconds. In the images below I will show how easy this keychain can be deployed without cutting the paracord or using any tools other than your hands.
This knot can be tied as bracelet, necklace, or in this case a keychain. This fob holds twelve feet of paracord ready to be used for such things as lashing a survival shelter or removing the inner strands for fishing line.

Click the Continue Reading button to view the unraveling process...


To unravel this keychain, start with the hangman's noose knot, pull the cord opposite the backbone cord until the noose pulls through the coil. This will leave you with two cords on the end, one being the backbone cord which is important in unraveling the keychain.
Now pull the backbone cord out the opposite side leaving you with a cord on each end of the keychain. Untie the securing loop, and pull out the end of the cord.
To finish unraveling the keychain, simply hold the right cord tightly and pull the securing loop cord and the knot should start to fully unravel.


 Unraveling the Hangman's Noose (Double-click the image to enlarge)

 Removing the backbone cord (Double-click the image to enlarge)


 Final Unraveling Process (Double-click to enlarge the image)


Monday, April 11, 2011

Unique Wide Solomon Bar Keychain

The Solomon Bar is probably the most common knot tied for key chains, fobs, bracelets, etc. The Wide Solomon Bar is an extension of the knot.
I wanted an earth toned key chain to swap out for my Alabama Monkey Fist key chain (until football season starts anyway). I had watched a video by JD @ TIAT that showed how to tie a Wide Solomon Bar bracelet with buckles and I thought that it would look great as a key chain.
This knot is fairly simple to tie if you have conquered the regular Solomon Bar, if not then it's easy to learn, might as well start now.  (Click the Continue Reading button for the remainder of this post...)


I used two four foot strands of Olive Drab 550 nylon paracord and one four foot strand of Desert Tan to complete this fob.